Beginner
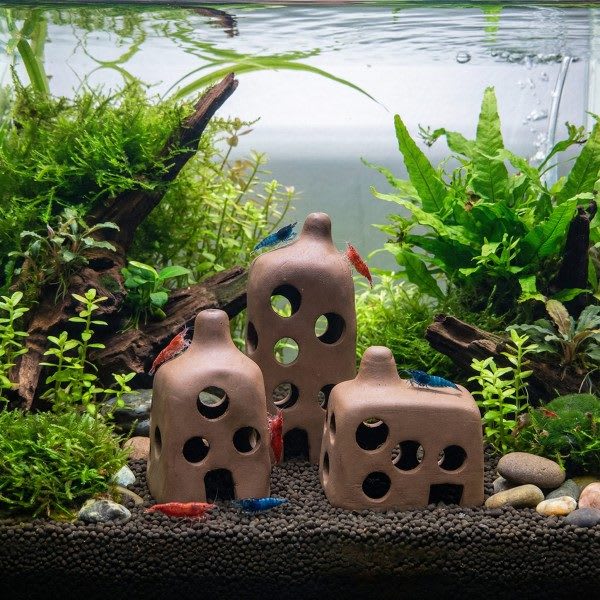
The Nano Shrimper
Soft water, dense moss, and a colony-first mindset in under 20 liters.
Volume
18 L
Est. monthly cost
~$12
Water target
22–24 °C · pH 6.2–6.8
Overview
A compact shrimp-focused setup built around stability, leaf litter, and gentle flow—ideal for learning shrimp behavior without a large footprint.
Pick ONE shrimp species before setting parameters: Caridina (e.g. Crystal Red) need soft, acidic water (pH 6.0–6.8, GH 4–6, TDS 100–150) and an active buffering soil; Neocaridina (e.g. Cherry) prefer harder, neutral water (pH 6.5–7.5, GH 6–10, TDS 180–280) on inert substrate. This blueprint targets Caridina; if you choose Cherry, switch to inert sand and aim higher pH/GH.
Sponge filtration plus a small heater band keeps the tank at 22–24 °C. Rooibos or alder cones gently tint water; monitor TDS weekly.
Plant choice leans toward moss walls, subwassertang, and slow growers that tolerate low light. Avoid fast stem plants that demand CO2 in such a small volume.
Feed sparingly: biofilm first, then a high-quality shrimp pellet 2–3 nights per week. Plan for monthly trim of moss to prevent detritus pockets.
Step-by-step setup guide
Tank & substrate preparation
Day 1Place the nano tank (18–20 L) on a level surface away from direct sunlight. Use an aquarium mat underneath to distribute weight evenly. Rinse the substrate—active buffering soil (e.g. ADA Amazonia or Tropica Soil) works best for Caridina, while inert sand suits hardier Neocaridina. Slope the substrate gently from back (~4 cm) to front (~2 cm) for depth.
- ▸Confirm level with a spirit level before filling—nano tanks magnify tilt visually.
- ▸If using buffering soil, expect ammonia leach for 2–4 weeks; plan the cycle accordingly.
Hardscape & botanicals
Day 1Add one or two small stones or a piece of spider wood as a focal point. Keep it simple—nano tanks look cluttered quickly. Scatter 3–5 alder cones and a few dried catappa leaf pieces on the substrate. These release tannins that lower pH and provide biofilm, a primary food source for shrimp.
- ▸Pre-soak driftwood for 48 hours to reduce initial tannin burst and waterlogging issues.
- ▸Avoid sharp-edged rocks that could damage shrimp during molting.
Planting
Day 1–2Attach Java moss and Christmas moss to hardscape using cotton thread or super glue gel. Plant Anubias nana on wood (never bury the rhizome). Fill gaps with subwassertang or mini pellia tucked between stones. These slow growers thrive under low light and provide surface area for biofilm and shrimplet hiding spots.
- ▸Spread moss thinly—thick clumps trap detritus and die underneath.
- ▸Quarantine new plants in alum dip (1 tbsp per gallon, 1–3 hours) to kill planaria or hydra, then rinse thoroughly.
Equipment installation
Day 2Install a small sponge filter rated for 15–30 L—sponge filters provide gentle flow and zero shrimplet risk. Attach a 25 W adjustable heater band set to 23 °C. Position a low-output LED light (~10–15 lumens/L) on a timer for 7–8 hours daily. No CO2 injection needed.
- ▸Air-driven sponge filters double as biological media—never replace the sponge, only squeeze in old tank water.
- ▸Use a thermometer strip or digital probe to verify heater accuracy before adding livestock.
Cycling & water conditioning
Week 1–4Fill with remineralized RO water (TDS 120–150 for Caridina, 180–250 for Neocaridina). Add a bacterial starter and let the tank cycle fully—ammonia and nitrite must read zero before stocking. During cycling, perform 20% water changes every 3 days to manage soil leachate. Monitor TDS, GH, KH weekly.
- ▸Ghost-feeding a pinch of shrimp food accelerates the nitrogen cycle.
- ▸A cycled sponge from an established tank can cut cycling down to 1 week.
Introducing shrimp
Week 4–5Start with 8–10 shrimp to establish the colony. Drip-acclimate over 1–2 hours: place the bag contents in a container and add tank water at 2–3 drops per second via airline tubing. Release shrimp gently. Expect them to hide for 24–48 hours. Observe for active grazing and molting within the first week.
- ▸Never mix Caridina with Neocaridina in the same tank—they cannot hybridize (different genera), but their GH, TDS, and pH targets are incompatible and one species will fail.
- ▸A single berried female can produce 20–30 shrimplets; plan for population growth.
Feeding & daily care
Week 5 onwardShrimp primarily graze biofilm; supplement 2–3 times per week with specialized pellets, blanched spinach, or mulberry leaves. Remove uneaten food after 2 hours. Daily: check temperature, observe behavior (lethargy or erratic swimming signals stress). Top off evaporation with pure RO water to maintain TDS.
- ▸Overfeeding is the #1 killer in nano shrimp tanks—biofilm alone sustains a small colony.
- ▸A feeding dish keeps food localized and makes cleanup easier.
Maturation & long-term maintenance
Month 2+The tank reaches maturity around 8–12 weeks: moss fills in, biofilm coats every surface, and the colony begins breeding. Weekly: 10–15% water change with matched-TDS remineralized water. Monthly: trim overgrown moss, clean glass with a magnetic scraper, rinse pre-filter sponge in old tank water. Quarterly: test GH, KH, and replace botanicals.
- ▸Never change more than 20% water at once—shrimp are sensitive to parameter swings.
- ▸A mature nano shrimp tank is largely self-sustaining; resist the urge to over-maintain.
Maintenance schedule
Weekly: 10–15% water change with remineralized RO or soft tap; rinse pre-filter sponge. Monthly: glass clean, moss trim, test GH/KH/TDS.
Suggested catalog links
Each link opens its catalog page. Import adds the fish and plants to My Tank; add the gear you already run there.
Import to My Tank
Applies tank volume, temperature, pH, light, CO₂ flag, and substrate from this blueprint, then adds any fish, plants, and equipment rows that match listed slugs or equipment ids in the live catalog.